Decorating your walls doesn’t have to mean spending a fortune at the store. With the right ideas, you can create stunning wall art that reflects your personality and style—all from the comfort of your home. I created this post to inspire those looking to add a personal touch to their living spaces without breaking the bank.
If you’re someone who enjoys DIY projects or simply wants to infuse creativity into your home decor, you’re in for a treat. This guide is perfect for art lovers, DIY enthusiasts, or anyone who wants to transform their walls into an expression of their uniqueness. You’ll find a variety of homemade wall art ideas that are not only creative but also eco-friendly and budget-friendly.
Get ready to dive into 14 delightful projects that will help you create unique wall hangings and personalized art pieces. From nature-inspired designs to fun and whimsical crafts, you’ll have plenty of options to choose from. By the end of this post, you’ll feel empowered to create beautiful decorations that tell your story and enhance your living space.
Key Takeaways
– Explore creativity: Discover 14 engaging DIY wall art ideas that encourage artistic expression and creativity in your home.
– Personal touches: Learn how to personalize your space with art that reflects your interests and memories, making your home truly unique.
– Eco-friendly options: Many projects use upcycled materials, helping you create beautiful art while being kind to the environment.
– Budget-friendly: Most projects are affordable, making it easy to spruce up your walls without spending a lot of money.
– Step-by-step guidance: Each idea offers practical tips and techniques to help you successfully create your own wall art at home.
1. Nature-Inspired Leaf Prints

Harness the beauty of the outdoors by crafting stunning leaf prints. This eco-friendly project transforms real leaves into captivating artworks using paint and canvas or paper. By collecting various leaves from your garden or nearby parks, you can create pieces that celebrate the intricate details of nature’s design.
Mixing different leaf shapes and sizes enhances visual interest, while vibrant colors can bring a lively energy to your home. Framing your prints can elevate their elegance, making them perfect for any room.
Consider these tips to make the most of your leaf prints:
– Pair different leaf shapes for unique compositions
– Use bold colors to create eye-catching designs
– Frame your prints to add a touch of sophistication
This homemade wall art not only beautifies your space but also serves as a daily reminder of nature’s wonders, enriching your environment with a sense of tranquility.
2. Upcycled Material Collages
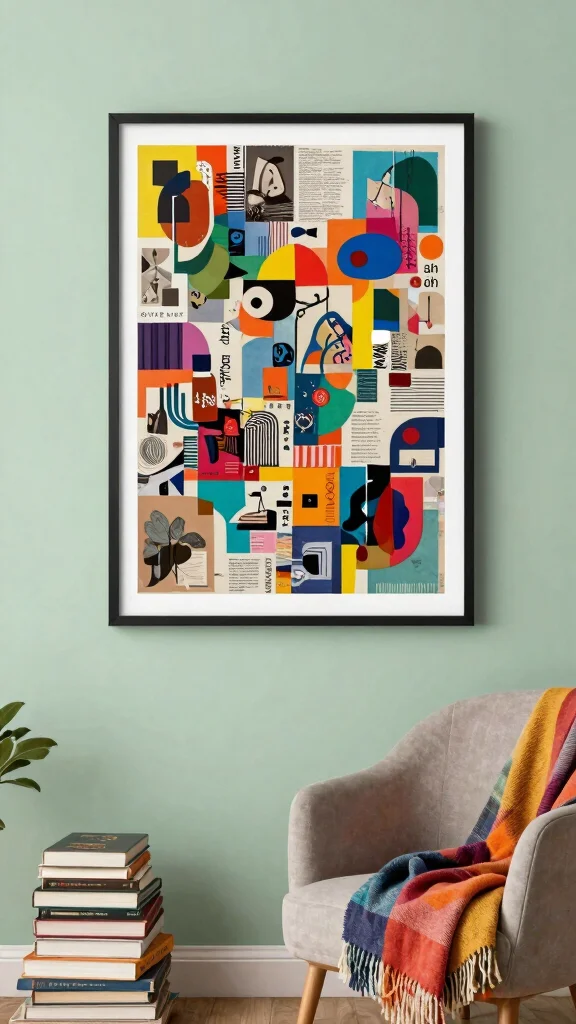
Transform old magazines and packaging into vibrant collages that enhance your walls. This creative endeavor allows you to express your artistic flair while being budget-conscious. By gathering colorful paper scraps, you can arrange them into fun shapes or patterns to create a truly personalized piece of art.
Using a glue stick ensures a neat finish, and layering different textures can add depth. Consider creating a cohesive theme for your collage to tie the elements together.
Here are some ideas to inspire your collage:
– Use a glue stick for a clean application
– Experiment with layering various textures
– Create a thematic collage for a unified look
These eye-catching wall hangings not only brighten your space but also spark conversations, making them a delightful addition to your home.
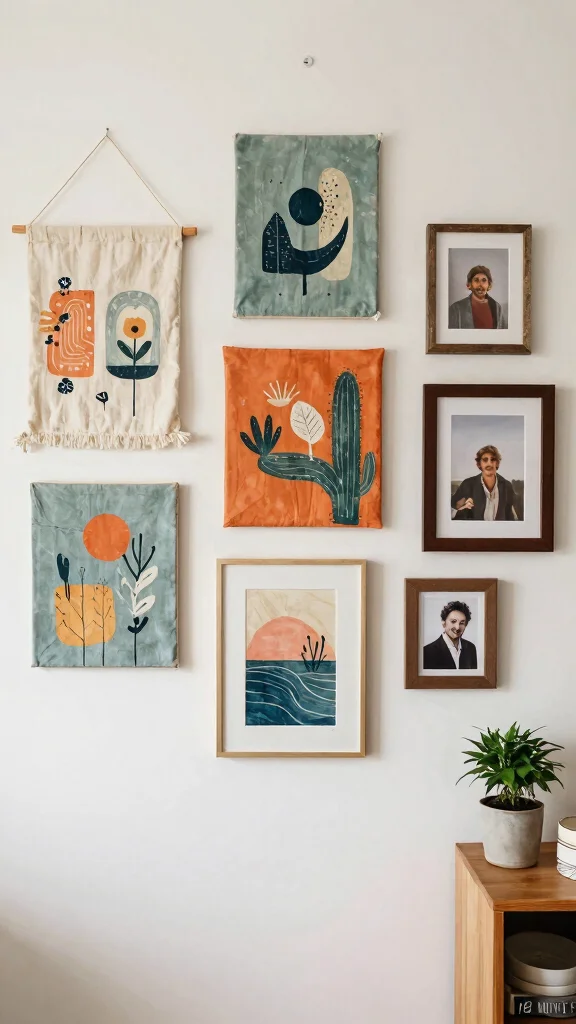
3. Personalized Photo Wall
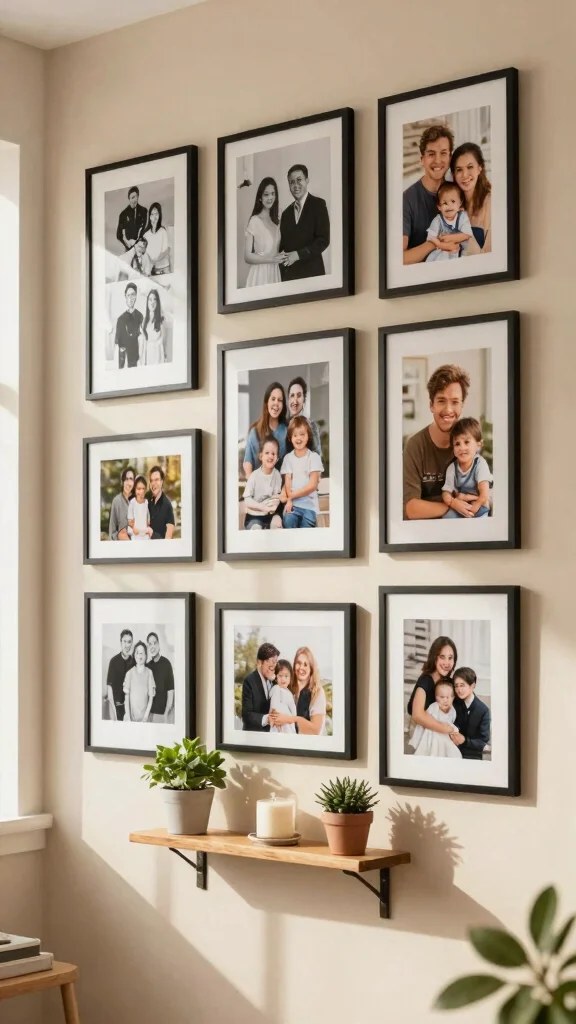
Design an inviting gallery wall by arranging your favorite photos in a stylish layout. Mixing frames of different sizes and styles creates an eclectic atmosphere that showcases your cherished memories. This project allows you to infuse your decor with personal touches, making your space feel uniquely yours.
Before hanging, lay the frames on the floor to experiment with different layouts. Mixing black-and-white photos with colored images adds contrast, while small decor items can fill empty spaces for a cohesive look.
Follow these tips for an effective gallery arrangement:
– Lay out frames on the floor before hanging
– Mix black-and-white with colored photos for contrast
– Incorporate decor items to fill gaps
A personalized photo wall not only warms up your home but also creates a meaningful visual narrative that reflects your journey.
4. Wooden Pallet Art
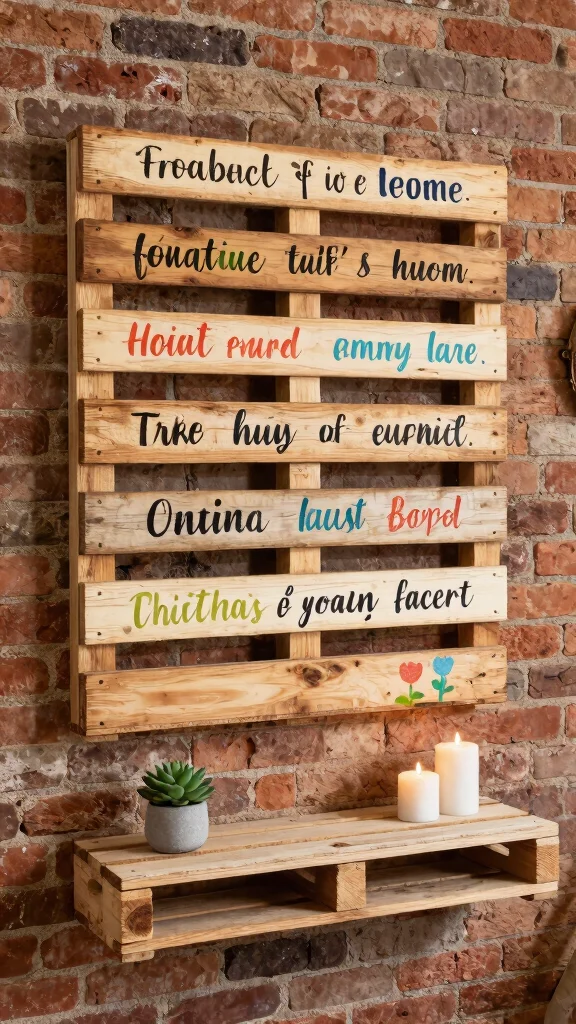
If you have access to old wooden pallets, consider turning them into rustic wall art. Pallet wood offers a unique charm, perfect for creating signs, shapes, or large-scale pieces. You can choose to leave the wood natural or add a splash of color for a more vibrant display.
Be sure to sand down any rough edges for safety, and use stencils to paint words or designs that resonate with you. Adding hooks or shelves can enhance functionality while showcasing your creativity.
Here’s how to create your pallet art:
– Sand edges to avoid splinters
– Use stencils for painting designs
– Add hooks or shelves for added functionality
This project not only adds character to your space but also promotes recycling, making it a great eco-friendly decor option.
How To Choose the Right Materials for Your Homemade Wall Art
Choosing the right materials for your wall art can make a big difference in the final look and feel of your project. Here’s how to select the best materials that suit your style and budget.
1. Consider Your Theme
Before you pick any materials, think about the theme of your wall art. Are you aiming for a natural look, a modern vibe, or something whimsical? Knowing your theme will help you choose the right colors and types of materials. For instance, if you want a nature-inspired piece, look for leaves, twigs, or canvas with earthy tones.
2. Choose the Right Base
Your base material can vary greatly based on your project. Common bases include canvas, wooden boards, or even recycled materials. If you want something sturdy, go for plywood or a thick canvas. For a more eco-friendly option, consider upcycled cardboard or old picture frames. Each base offers a different texture and feel, so pick one that matches your vision.
3. Think About Colors
Color selection plays a huge role in the impact of your wall art. Choose colors that complement your home decor. Use a color wheel to find harmonious shades. For a calming effect, stick to similar hues. If you want to make a bold statement, consider using contrasting colors. Remember, you can mix paints or even use fabric scraps to create unique color combinations.
4. Evaluate Your Tools
The tools you have can influence your choice of materials. You might need paintbrushes, scissors, glue, or even a sewing kit for fabric art. Ensure you have everything you need before starting your project. If you want to create string art, for example, you’ll need sturdy thread and nails along with your base material. Check your toolbox before finalizing your material list.
5. Budget Wisely
Setting a budget is crucial when choosing materials. Homemade wall art can be made inexpensively with recycled items or inexpensive supplies from craft stores. Make a list of what you need and shop smartly. Look out for sales or consider swapping materials with friends. It’s possible to create stunning wall art without breaking the bank!
6. Test for Durability
Lastly, think about how long you want your wall art to last. Some materials are more durable than others. For indoor pieces, lightweight materials might work fine. But if you’re considering outdoor art, choose weather-resistant materials. Test your materials ahead of time to ensure they hold up to the environment you place them in.
💡 Pro Tip: Always keep a small sample of your materials to test different techniques before committing to a full piece. This way, you can experiment with color mixing or texturing without wasting your main supplies.
By following these steps, you can confidently choose the right materials for your homemade wall art, ensuring it reflects your creativity and style while fitting within your budget. Happy crafting!
5. Fabric Wall Hangings

Create stunning wall hangings using scraps of fabric to add texture and warmth to your home. This DIY project is ideal for textile lovers looking to incorporate fabric into their decor. Simply sew or knot the fabric pieces onto a wooden dowel for a simple yet beautiful hanging solution.
Mixing patterns and colors can produce a vibrant look, while adding elements like tassels or macramé can introduce more visual interest. Choose fabrics that resonate with your personal style, whether bohemian, modern, or rustic.
Consider these creative inspirations for your fabric wall hangings:
– Mix patterns and colors for vibrancy
– Incorporate tassels or macramé for added texture
– Use fabrics that reflect your personal style
These fabric creations serve as eye-catching focal points that can be easily updated with seasonal fabric choices, keeping your decor fresh.
Fun fact: upcycling fabric scraps into wall art homemade pieces can cut textile waste by 30–50% in a single room. Mix patterns and textures, and your DIY wall art becomes a personal, eco-friendly centerpiece that’s easy to update as your style changes.
6. Dried Flower Arrangements
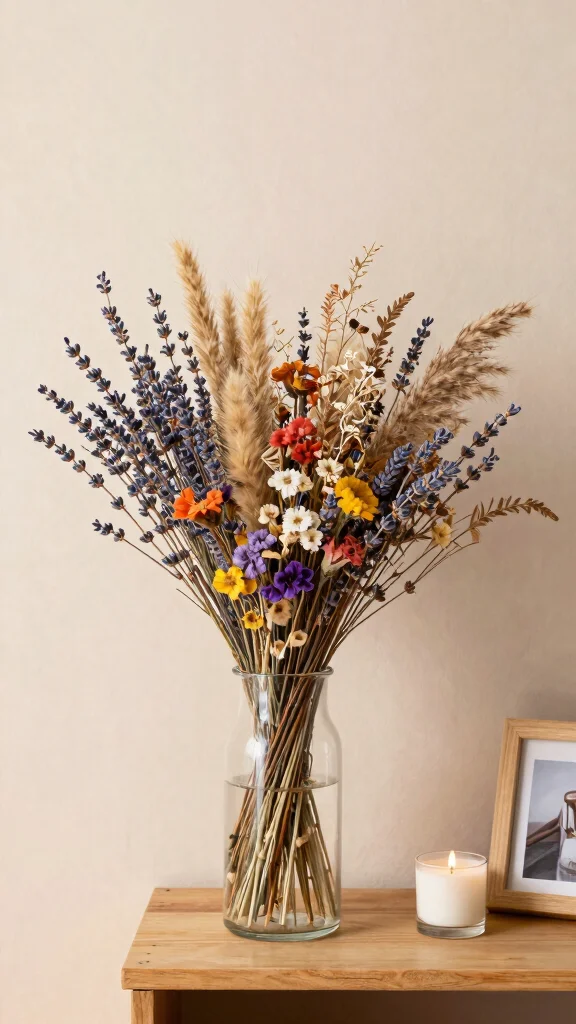
Invite the essence of nature into your home with DIY dried flower arrangements. Collect flowers from your garden or local areas, allowing them to dry before arranging them in a lovely display. Whether in a simple vase or a creative wall-mounted holder, these arrangements add a touch of charm.
Select flowers that retain color when dried, such as lavender or hydrangeas. Experiment with different heights and textures for a dynamic arrangement, and consider incorporating greenery for added depth.
To create stunning dried flower displays, keep these tips in mind:
– Choose flowers that maintain their color
– Experiment with heights and textures
– Add greenery for contrast and depth
These arrangements not only brighten your walls but also bring the delightful fragrance of the outdoors inside, enriching your living space.
7. Geometric Art with Tape
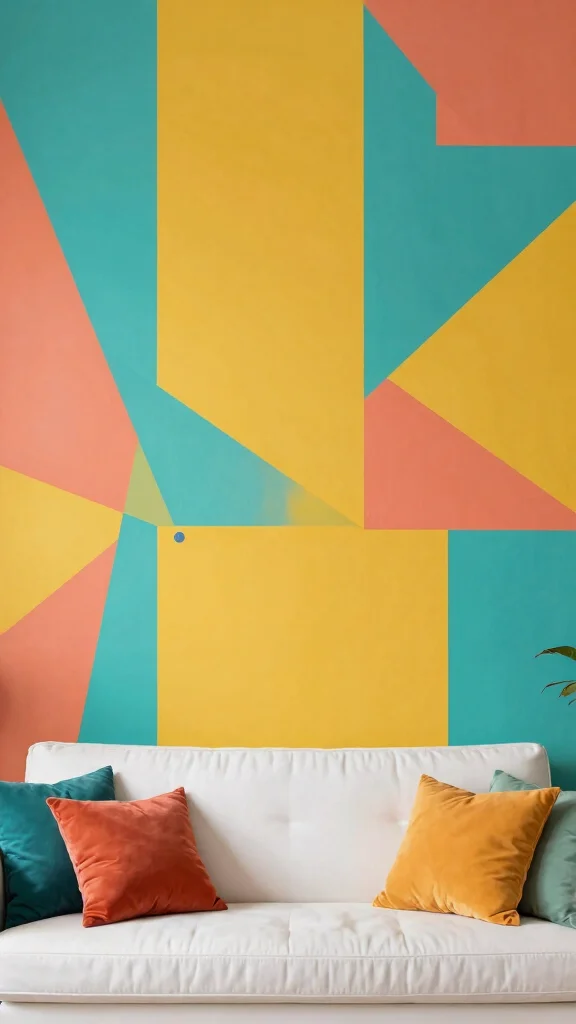
For a modern touch, use painter’s tape to create geometric patterns on your walls. This technique is easily customizable to fit your existing decor style. By taping off sections and painting them in various colors, you create a fun and vibrant display that energizes your space.
Choose a color palette that complements your room and get creative with angles and shapes for visual intrigue. Ensure the tape is applied carefully to prevent paint bleed, resulting in a crisp finish.
Here are some tips to nail the geometric look:
– Select a color palette that enhances your decor
– Get creative with angles and shapes
– Ensure well-taped edges to avoid paint bleed
This DIY wall decor is striking and highly customizable, making it perfect for anyone wanting to add a personal touch to their home.
8. String Art Creations
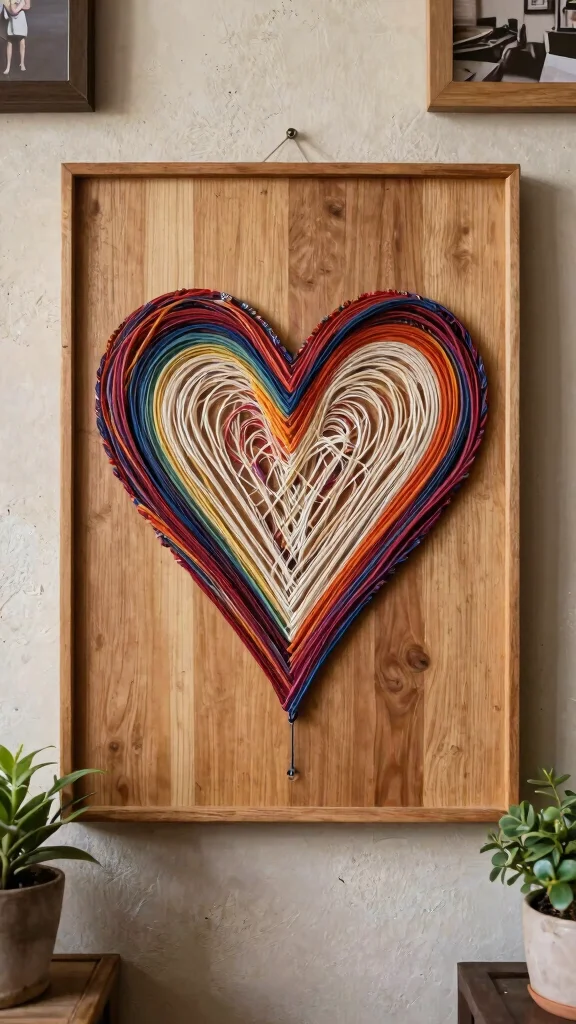
Engage your creativity with string art, a project that involves wrapping string around nails to create beautiful designs. With just wood, nails, and colorful string, you can craft stunning pieces that become focal points on your walls.
Select a simple design, such as hearts or stars, and hammer nails into the wooden base to outline your shape. Wrapping string around the nails allows you to fill in patterns, adding a unique touch to your art.
To get started with string art, follow these steps:
– Choose a simple shape for your design
– Hammer nails into the wood outline
– Wrap the string around nails for visual appeal
This project beautifully blends art and craftsmanship, resulting in an eye-catching wall hanging that reflects your creativity.
Turn wood, nails, and string into wall art homemade with string art – perfect for hearts and stars, no fancy tools required. Pro tip: sketch the outline, hammer the nails, wrap the string in layers to add color and texture. Ready to create a focal point that’s inexpensive and personal?
9. Painted Rocks Display
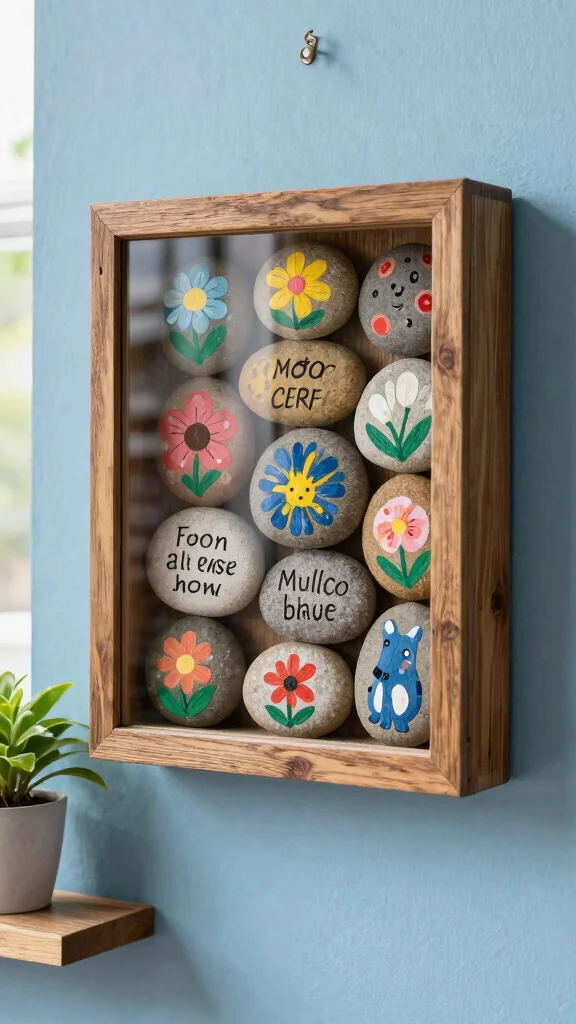
Infuse your home with outdoor charm through painted rocks. Gather smooth stones and unleash your creativity by painting them with fun designs or uplifting messages. Once dried, these painted rocks can be arranged in a shadow box or displayed on a shelf for a whimsical touch.
Bright colors and playful patterns make these rocks stand out, while inspirational quotes or animal images add a personal touch. Creating themed sets, whether seasonal or holiday, can enhance their visual appeal.
Consider these creative ideas for your painted rocks:
– Use bright colors and fun designs
– Paint quotes or animal images
– Create themed sets for cohesive displays
This delightful DIY project adds a personal touch to your space, making it a fun activity for all ages.
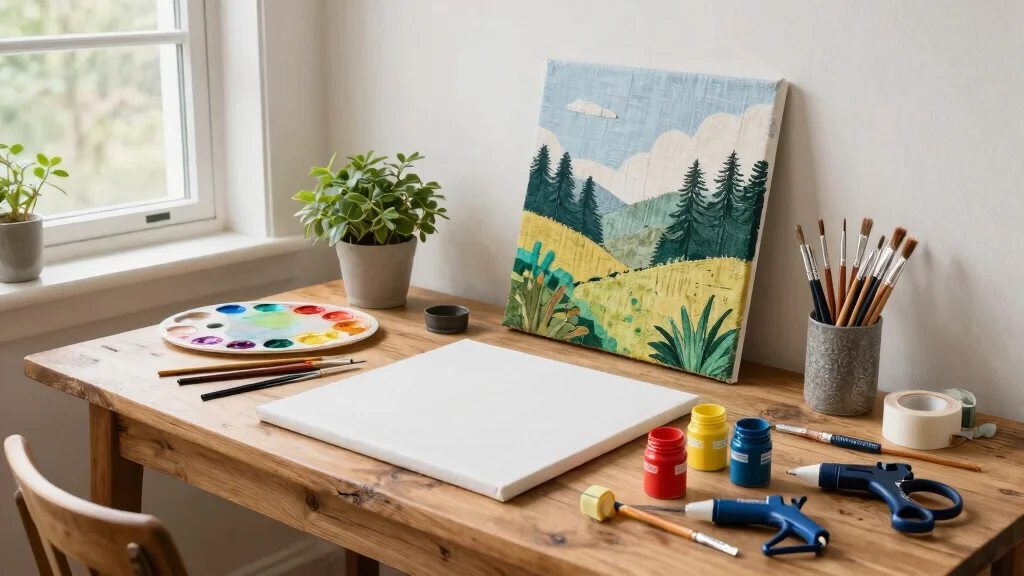
10. Canvas Art with Nature Prints
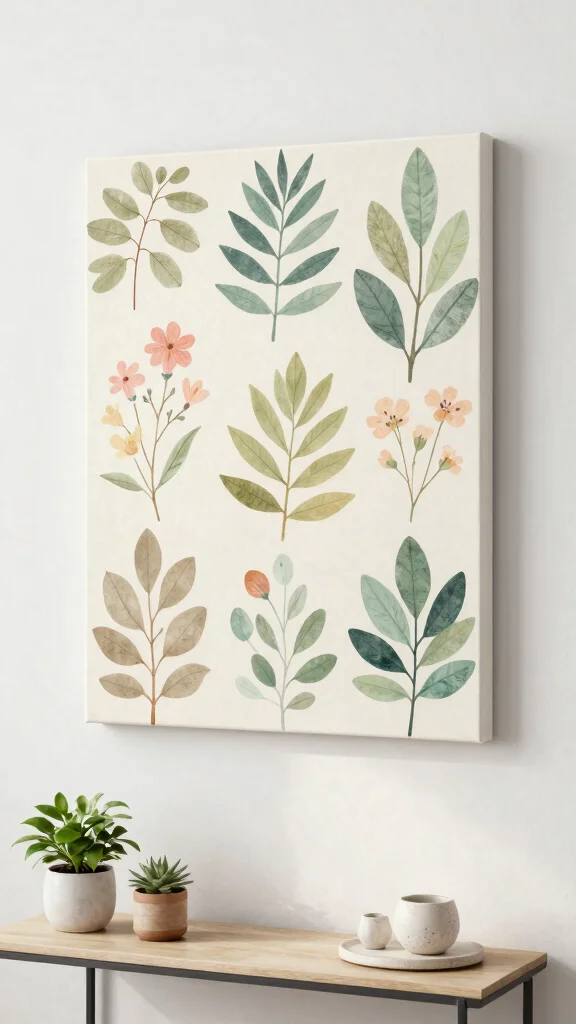
Capture the beauty of nature with canvas art featuring prints of flowers, leaves, or branches. By pressing these natural elements onto canvas with paint, you create unique impressions that celebrate the outdoors. This project allows you to bring a piece of nature into your home in a personal way.
Gather leaves, flowers, or twigs and arrange them creatively on the canvas. Apply paint with a brush, pressing down firmly to transfer designs, resulting in stunning artwork that resonates with nature.
Follow these steps to create nature prints:
– Gather natural elements for your canvas
– Apply paint to the elements before pressing
– Press firmly to ensure clear impressions
This project not only adds a personal touch to your decor but also encapsulates the essence of nature, inviting its beauty indoors.
11. Embroidery Hoop Art

Brighten your walls with charming embroidery hoop art, a wonderful way to showcase fabric scraps or inspiring quotes. Start by selecting your favorite fabric and stretching it within an embroidery hoop. You can enhance the piece with simple stitching or hot glue decorations for added flair.
Choose vibrant fabrics to create a focal point that draws the eye. Experimenting with different hoop sizes can create a playful gallery effect, while incorporating personal messages adds an emotional touch.
Keep these quick tips in mind for your embroidery hoop art:
– Use vibrant fabrics for visual interest
– Try various hoop sizes for a gallery feel
– Add personal messages for inspiration
These unique wall hangings not only create texture but also make your space feel more inviting and personal.
12. Whimsical Wall Decals
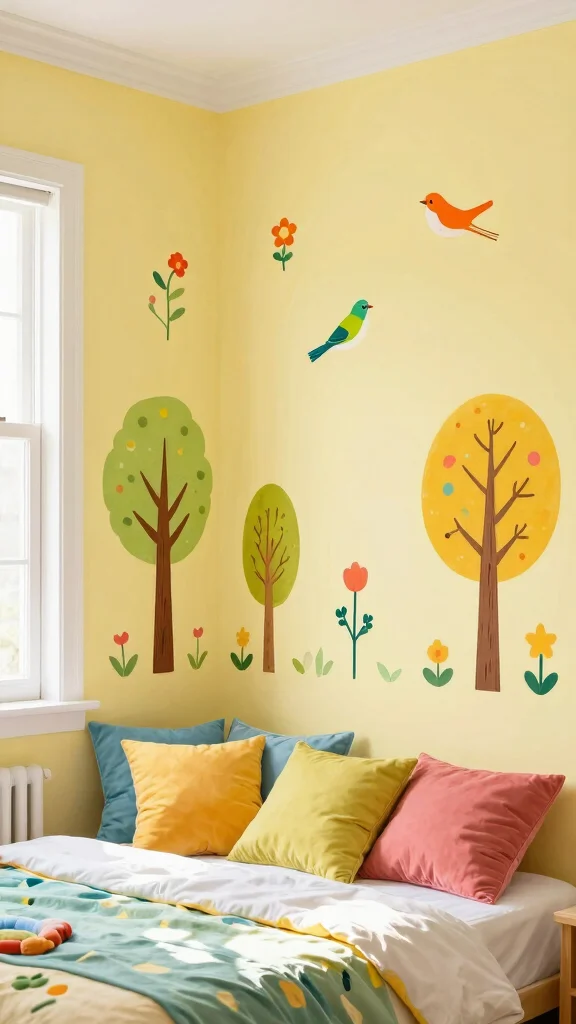
If you want a quick and impactful way to refresh your space, consider making your own wall decals. Using removable vinyl or painted designs, you can create playful shapes, quotes, or patterns that express your personality. The best part? They’re easy to change as your style evolves.
Think about nature-themed designs like trees or animals, or choose quotes that motivate you. This approach is also ideal for adding playful elements to kids’ rooms, making it versatile for any space.
Here are some ideas for your wall decals:
– Explore nature themes like trees or animals
– Use motivational quotes to inspire
– Create playful designs for children’s spaces
These creative home decorations can turn a blank wall into a vibrant focal point while being eco-friendly and budget-conscious.
13. Mosaic Art from Recycled Glass

Create eye-catching mosaic art using recycled glass pieces, repurposing old bottles or broken glass into colorful masterpieces. Arranging these glass pieces into patterns on a sturdy backing allows for endless creative possibilities. Filling the gaps with grout adds a polished finish to your artwork.
Be sure to wear safety gloves while handling glass, and design your mosaic layout before securing pieces in place. If you plan to display your art outdoors, consider using weather-resistant materials for durability.
Follow these steps to create your mosaic:
– Collect glass pieces while wearing gloves
– Design your layout before gluing
– Use weather-resistant materials for outdoor displays
This vibrant DIY wall decor not only looks fabulous but also supports sustainable living, making it a fulfilling creative project.
14. Hand-Painted Canvas Quotes
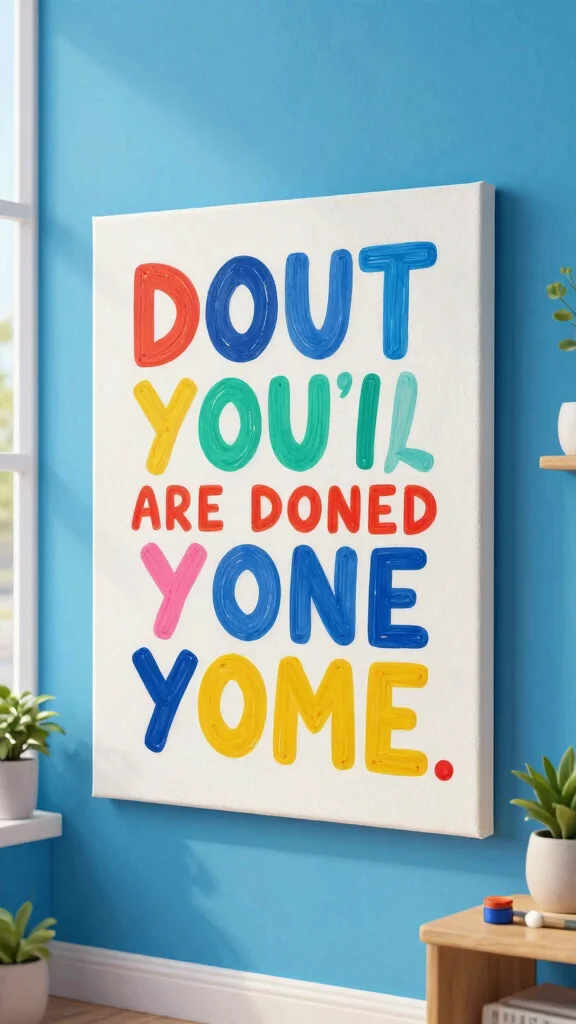
Share your favorite mantras or quotes through hand-painted canvas art. This DIY project is a wonderful way to express your personality and values while adding color and charm to your walls. Choose an inspiring quote, sketch it lightly, and fill it in with paint to bring it to life.
Using a mix of fonts and colors can create visual interest, while decorative elements like borders or florals can enhance the overall appeal. Hang your artwork where you’ll see it daily for a constant boost of inspiration.
Here are some hand-painting tips:
– Use varied fonts and colors for appeal
– Add borders or florals for extra flair
– Place your artwork in a visible spot for daily motivation
These personalized art projects not only beautify your space but also serve as meaningful reminders that set the tone for your home.
Creating wall art homemade with hand-painted canvas quotes isn’t about perfection. It’s about personality. Pick a quote that fits your vibe, sketch lightly, and paint in bold colors; you’ll brighten daily spaces and stay inspired.
Conclusion
Creating your own wall art is not just about decoration; it’s a way to express who you are and share your story with others. Each of these 14 homemade wall art ideas invites you to unleash your creativity while being eco-friendly and budget-conscious.
Choose projects that resonate with you, and don’t hesitate to mix and match different techniques. Your walls are a blank canvas, so let your imagination run wild and fill them with art that brings you joy!
Note: We aim to provide accurate product links, but some may occasionally expire or become unavailable. If this happens, please search directly on Amazon for the product or a suitable alternative.
This post contains Amazon affiliate links, meaning we may earn a small commission if you purchase through our links, at no extra cost to you.
Frequently Asked Questions
What are some easy homemade wall art ideas that are eco-friendly and budget-friendly?
Here are a few DIY wall decor ideas that are budget-friendly decor ideas and simple to make at home.
– Recycled paper collage in a frame: collect old magazines or kraft paper, cut shapes, and glue them onto a canvas. Finish with a light sealant to keep edges neat.
– Fabric scrap wall hanging: tie or stitch colorful scraps to a wooden dowel for a soft, tactile piece.
– Pressed leaf art: press leaves between sheets of parchment, then mount in a frame for a natural touch.
– Upcycled book page art: arrange printed or handwritten quotes and abstract shapes on a canvas, then seal.
– Cardboard geometric wall art: cut cardboard into triangles or diamonds, paint or wrap with decorative paper, and mount in a grid. All of these qualify as wall art homemade that add personality without a big price tag.
How can I create personalized art projects that fit my space and reflect my style?
Start by measuring your wall and choosing a color palette that matches your room. Pick a theme that matters to you—family memories, travel, nature—and translate it into personalized art projects. Try a photo grid, handwritten quotes on kraft paper, or a DIY calendar with meaningful dates to create unique wall hangings. For budget-friendly and eco-conscious decor, reuse thrifted frames, print at home, and use recycled materials. The result will be creative home decorations that feel truly yours.
What supplies do I need to try these 14 homemade wall art ideas?
Getting started with wall art homemade projects doesn’t have to be expensive. Basic supplies: scissors, craft knife, ruler, pencil, glue (mod podge or white glue), double-sided tape, and a selection of sturdy supports (canvas, wood, or heavy paper). Eco-friendly options include water-based paints, plant-based dyes, recycled cardboard, scrap fabric, and upcycled frames. Extras: nails or picture hooks for hanging, a hammer, a spray sealer or matte varnish, and a journal to plan layouts. With these, you can try many ideas quickly and DIY wall decor projects with confidence.
How can I arrange and mount unique wall hangings to look cohesive?
Plan your display like a mini gallery. Pick a focal piece, then group others around it with even spacing (aim for 2–3 inches or 5–8 cm). Keep a consistent frame style or color palette to tie unique wall hangings together. Lay out designs on the floor first, or use paper templates on the wall to test spacing before nailing or taping. Mix textures (paper, fabric, wood) but stay within your color scheme to achieve serene creative home decorations.
How do I care for and preserve these homemade wall art pieces?
To keep your wall art homemade looking good, avoid direct sunlight and high humidity. Use UV-protective glass or matte sealant on prints, and choose acid-free mats and backing when framing. Dust gently with a soft cloth and avoid harsh cleaners. For pieces on fabric or wood, check for peeling edges and re-seal if needed. Rotate your display every few months to keep it fresh and prevent fading, while extending the life of your DIY wall decor collection.
Related Topics
homemade wall art
DIY wall decor
personalized art
eco-friendly decor
unique wall hangings
budget-friendly art
creative home decorations
easy DIY projects
beginner friendly
upcycled materials
modern wall art
seasonal decor