When it comes to home decor, nothing makes a statement quite like wall art. It can transform a blank wall into a vibrant focal point, add character to your space, and express your unique personality. This post is all about helping you navigate the sometimes overwhelming world of wall art sizing. With countless options available, I created this guide to simplify your choices and ensure that your art fits perfectly in your home.
If you’re someone who loves interior design or enjoys curating beautiful spaces, this guide is for you. Whether you’re just starting your decor journey or looking to refresh your existing collection, understanding wall art dimensions is key. You’ll find useful tips and insights to help you choose the right size for your space, explore the idea of gallery walls, and even consider the impact of framed botanical art.
In this article, you’ll learn about the importance of art placement, practical measuring tips for your walls, and how to incorporate various styles and colors into your decor. By the end, you’ll feel confident in selecting art that not only fits your style but also enhances your home’s ambiance. Get ready to discover the perfect fit for your walls!
Key Takeaways
– Understanding wall art dimensions is crucial for creating balance and harmony in your spaces, ensuring that the art complements rather than overwhelms.
– Choosing the right size for your wall art is about proportion; consider the scale of your furniture and the dimensions of your walls to make the best selection.
– Gallery walls allow for creativity and personal expression; they can showcase multiple pieces in varying sizes for a dynamic look.
– Framed botanical art adds a timeless touch to any room and can bring nature’s beauty indoors, enhancing your decor with freshness.
– Proper placement and measuring techniques will prevent awkward gaps and ensure your art is displayed at eye level for maximum impact.
1. Understanding Wall Art Dimensions
When you’re selecting wall art, recognizing dimensions is key to achieving a harmonious look. Smaller artworks can often feel lost against a vast wall, while oversized pieces can dominate a compact area. Start by measuring your wall to gauge how much space you want to dedicate to art. Aim for your artwork to fill about 50-75% of the available wall space for a balanced appearance.
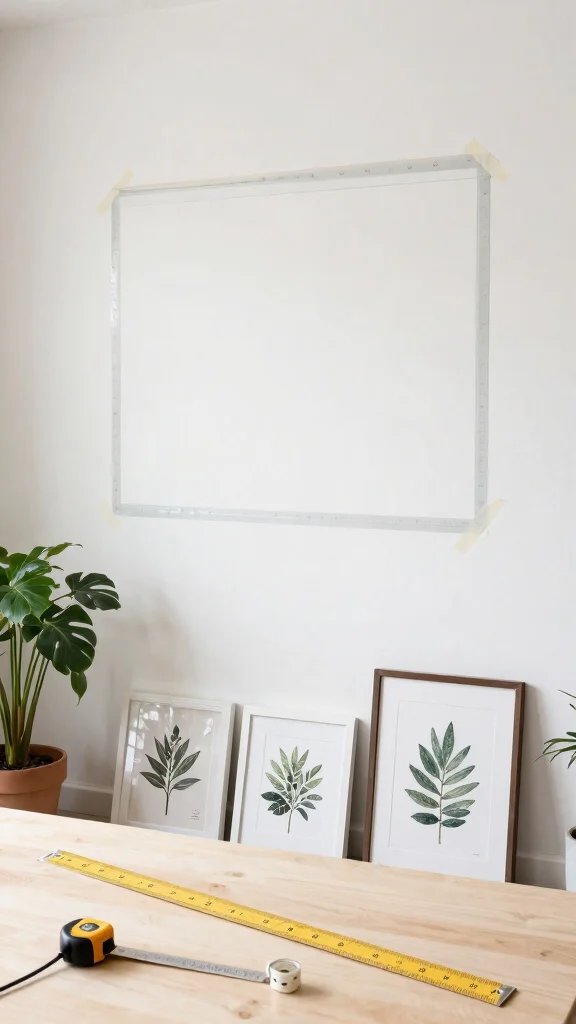
To effectively implement these dimensions, consider using painter’s tape to outline where you intend to hang your art. This will help you visualize the scale and placement. In smaller areas, it’s often best to choose one or two larger pieces to avoid clutter, while larger walls can benefit from a mix of sizes for a more engaging gallery feel.
Guidelines to keep in mind:
– Measure your wall to understand available space.
– Use painter’s tape to visualize art placement.
– Aim for art to occupy 50-75% of wall space.
– Consider a mix of sizes for visual interest.
Hanging art at eye level—approximately 57-60 inches from the floor—ensures optimal viewing. By mastering these dimensions, you’ll make informed choices that enhance your space.
If your wall says ‘more is better,’ try this: measure first, then aim for 50-75% coverage. A quick painter’s tape outline helps you preview the look before you hang—this wall art size guide turns chaos into calm.
2. Choosing the Right Size for Your Space
Picking the ideal size for wall art can dramatically change the feel of a room. In smaller spaces, large art pieces can provide focus without overwhelming the area. For instance, a 24×36 inch artwork can serve as a striking centerpiece, while larger rooms may benefit from expansive pieces, like a 48×60 inch canvas or a triptych that captivates the eye.
To ensure you choose the right size, evaluate the wall prior to selecting your art. A larger canvas will create a sense of drama, while smaller pieces work better in clusters. Additionally, remember to consider furniture placement—art above a sofa should ideally be two-thirds the width of the couch for balance.
Key points to remember:
– Assess wall size before selecting artwork.
– Opt for larger pieces in spacious areas.
– Position art above furniture for balance.
– Mix sizes and styles for visual variety.
Choosing the right size of wall art enhances the harmony of your decor, making your space feel inviting and well-designed.
Fun fact: In small spaces, a single 24×36 inch wall art acts as a focal point. A simple wall art size guide shows larger rooms benefit from 48×60 inch pieces or triptychs that add drama without crowding.
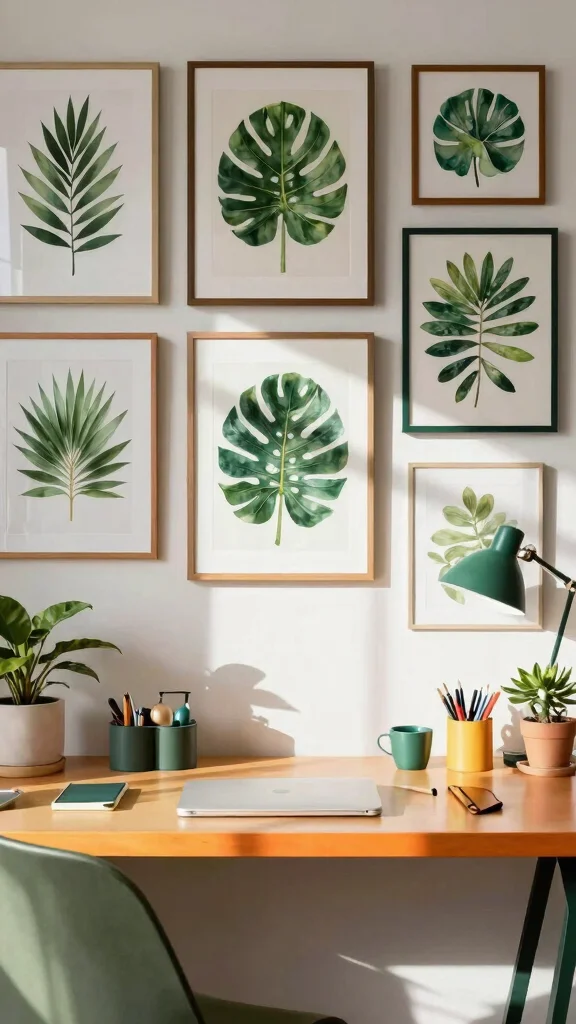
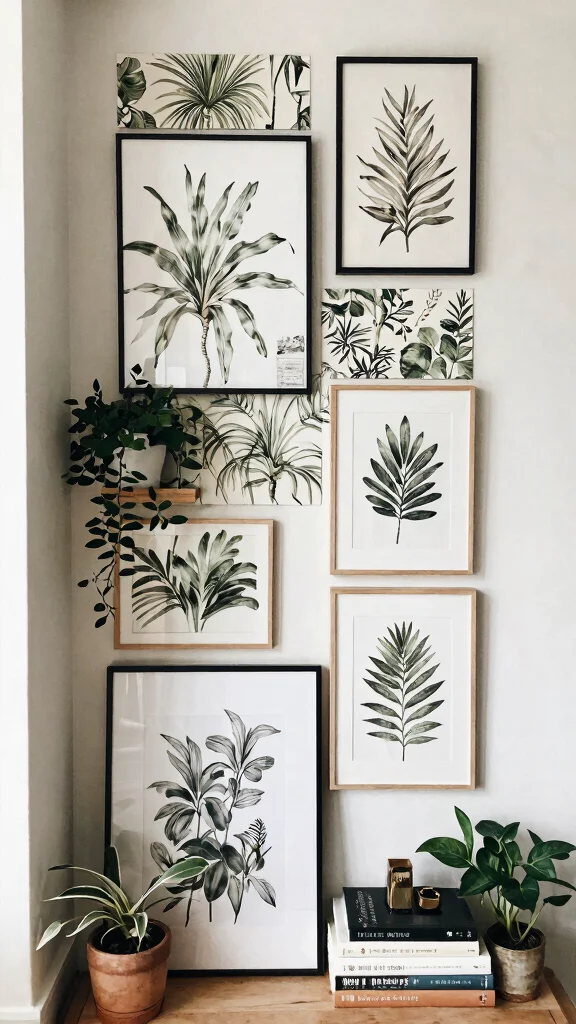
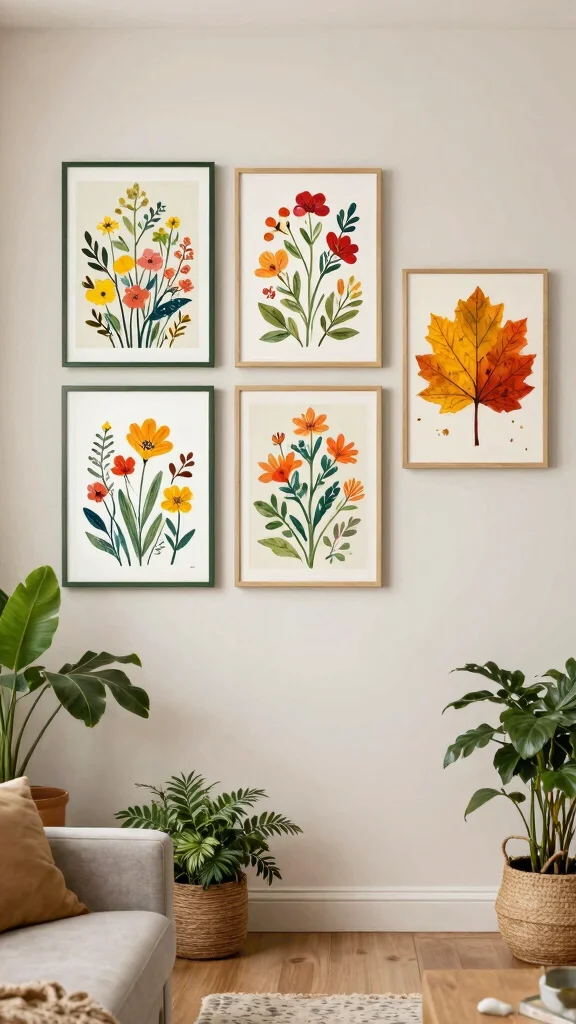
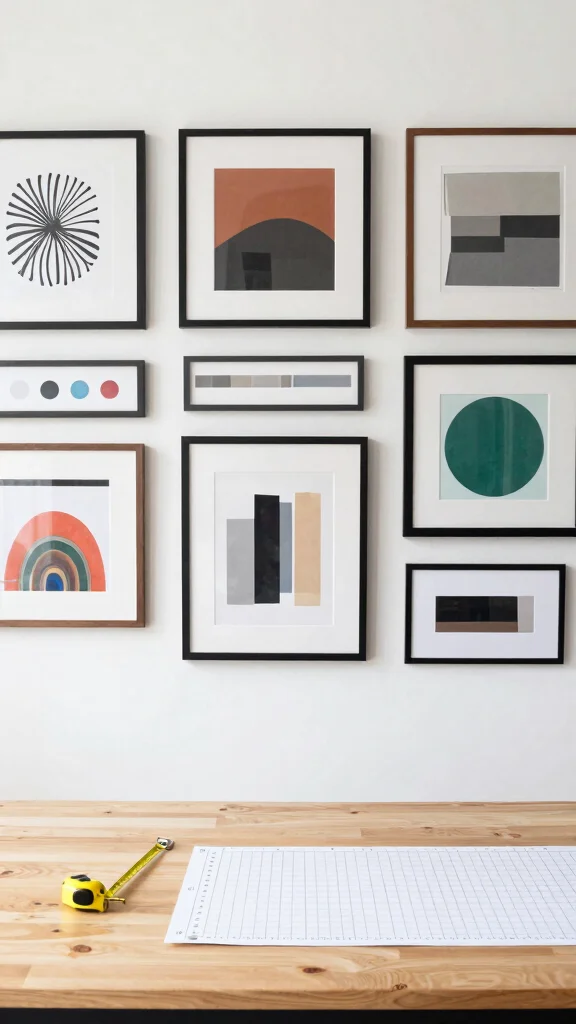
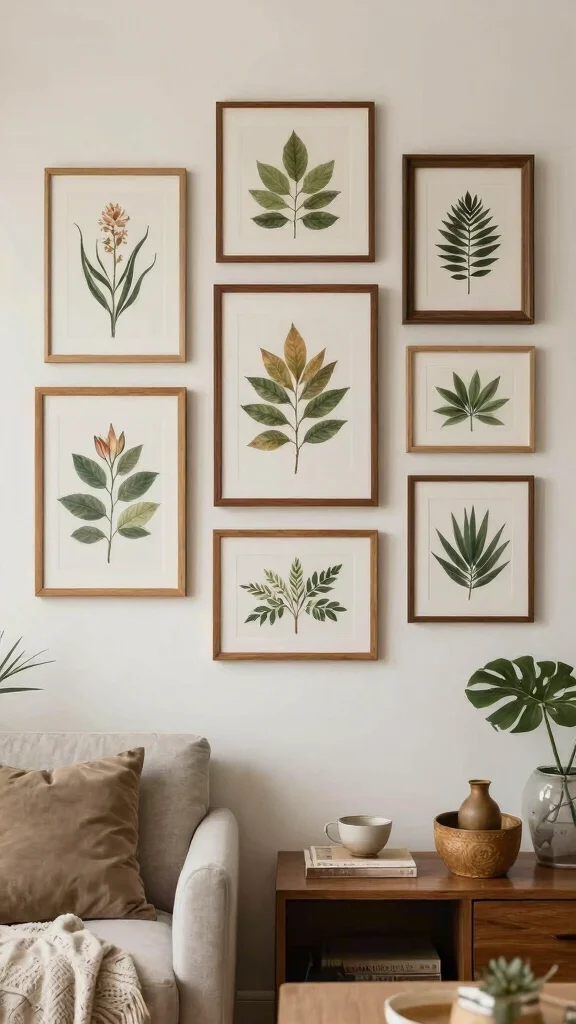
3. The Power of Gallery Walls
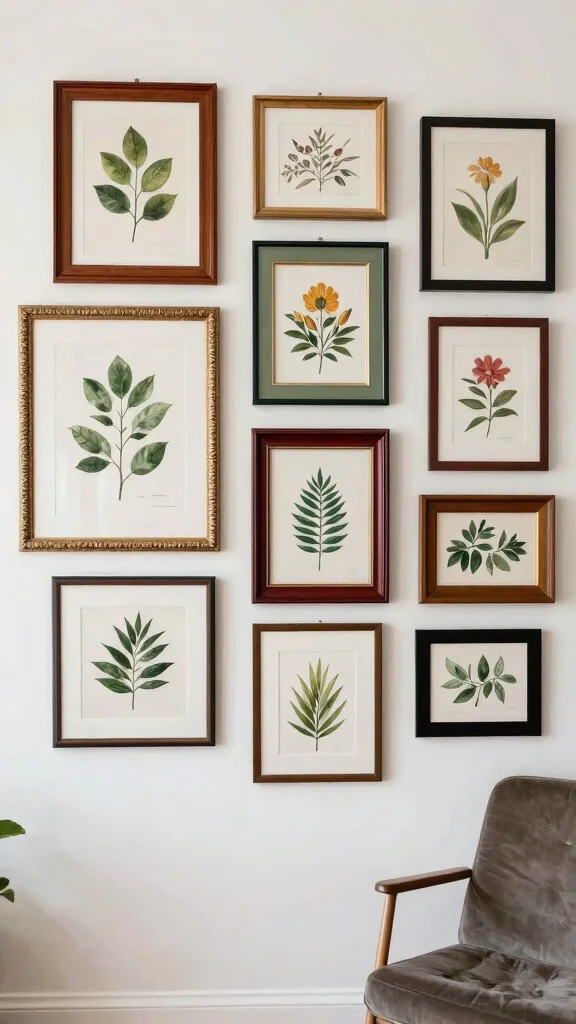
Gallery walls are a wonderful way to express your personal style and tell a visual story in your home. When planning a gallery wall, consider mixing different sizes and shapes to create depth and interest. Start with a standout piece as your focal point, then surround it with smaller artworks that maintain a cohesive theme, such as botanical prints or abstract designs.
Before hanging, try laying out your pieces on the floor to find an arrangement that feels right. Use a variety of frame styles to add texture and consider spacing them about 2-3 inches apart for a polished look.
Creating a gallery wall:
– Lay out pieces on the floor before hanging.
– Use various frame styles for added texture.
– Maintain spacing of 2-3 inches between pieces.
A well-crafted gallery wall can turn an empty space into a captivating focal point, inviting admiration and conversation in your home.
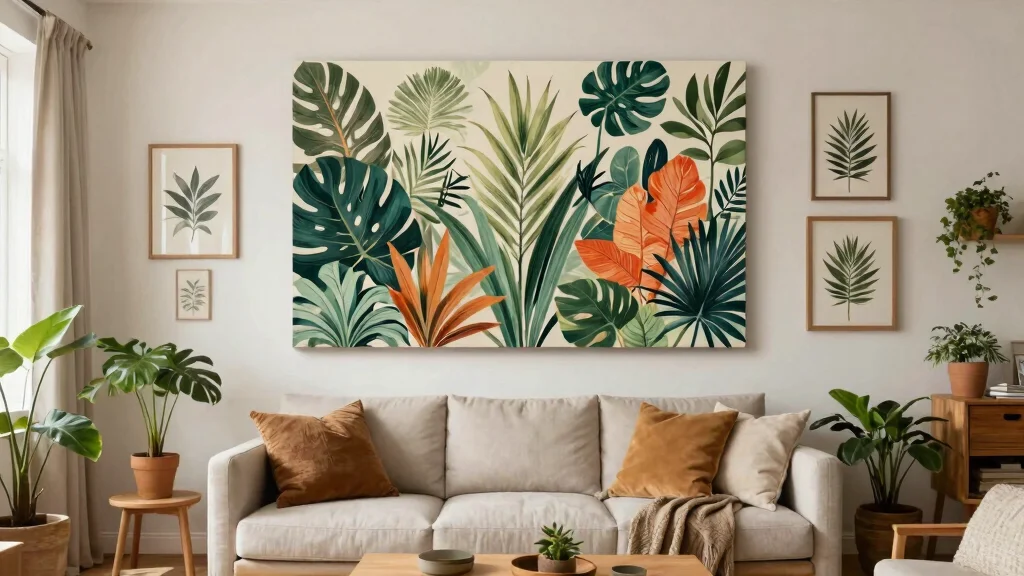
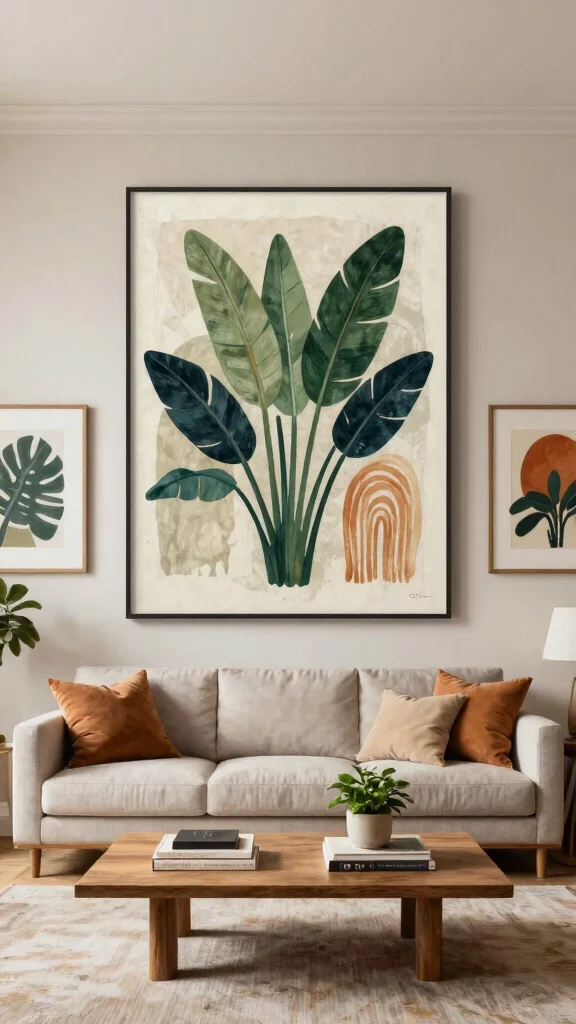
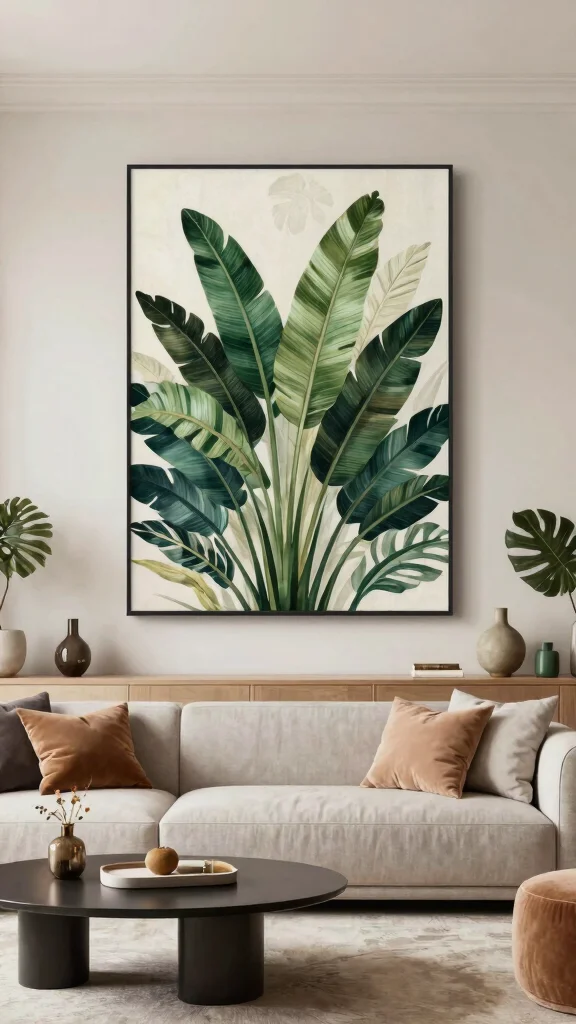
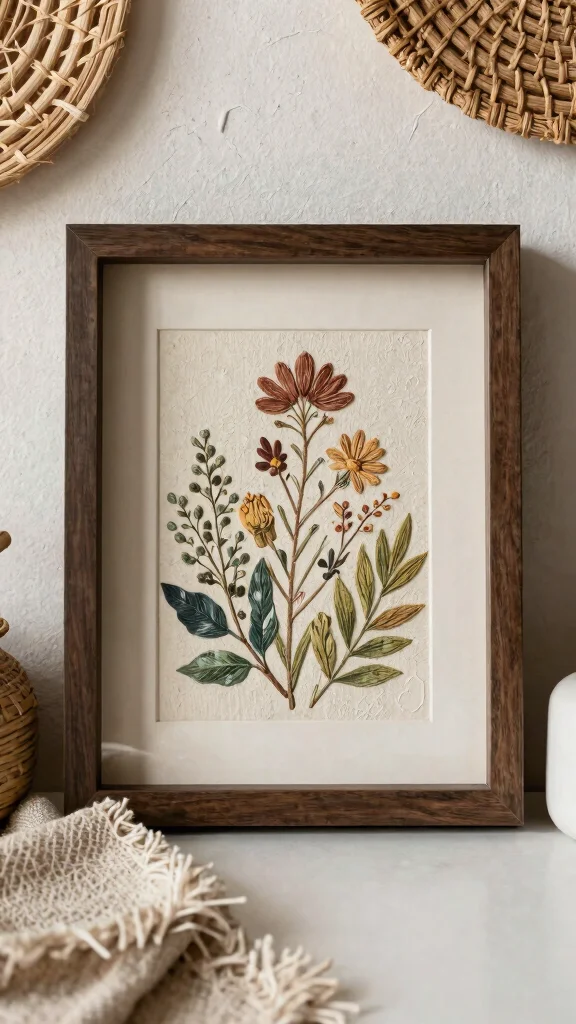
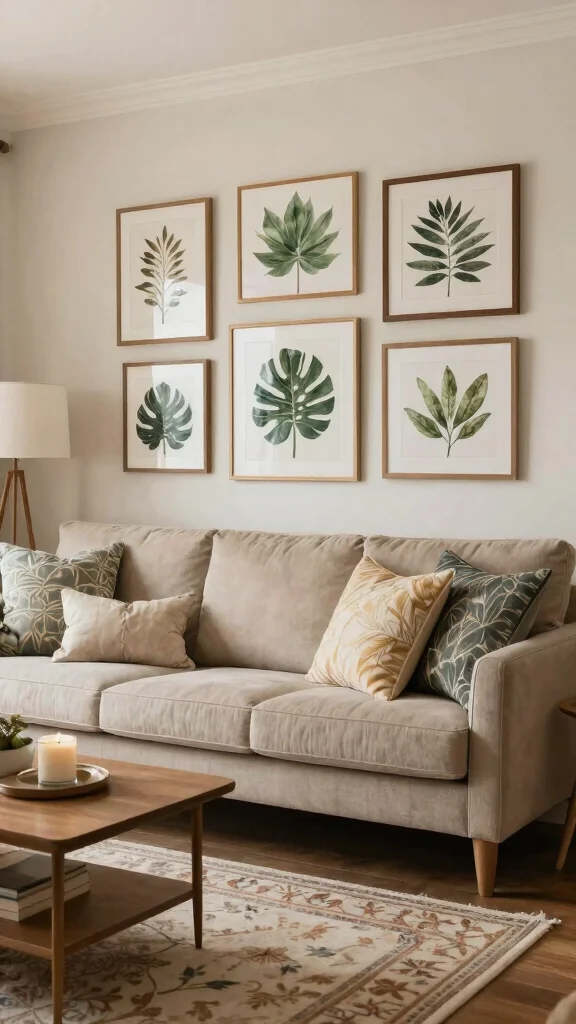
4. Framed Botanical Art: A Timeless Choice
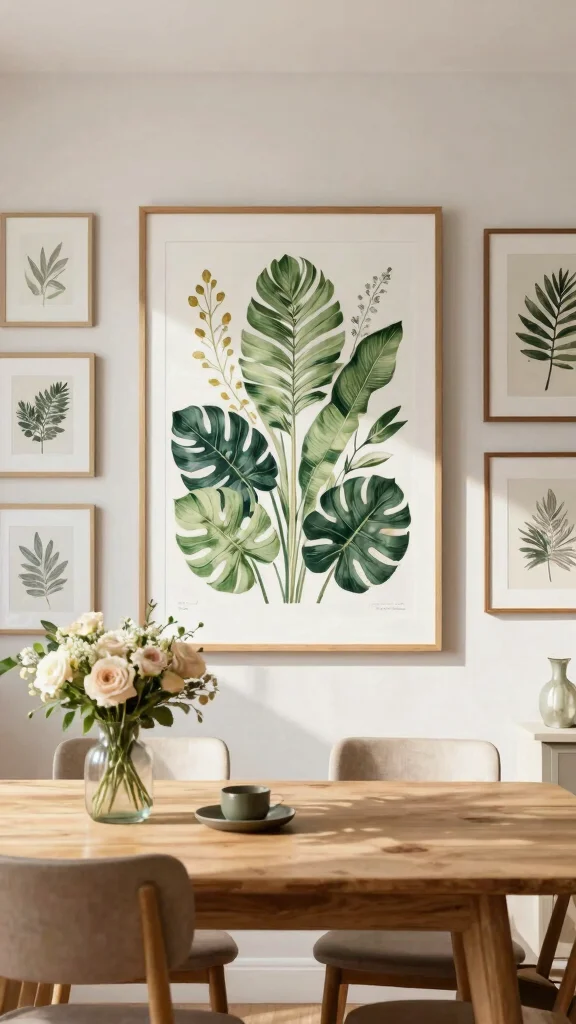
Framed botanical art is a timeless addition that brings the beauty of nature indoors. These pieces can infuse your space with tranquility and elegance. When selecting botanical prints, consider the overall decor of your room; a large, framed piece can serve as a striking focal point while smaller prints can provide lovely accents around the space.
For a classic look, opt for muted colors, or choose vibrant hues for a lively pop. Combining real plants with your botanical art can create a fresh, layered effect that enhances the natural theme.
Tips for using botanical art:
– Choose muted colors for a classic feel.
– Mix real plants with artwork for depth.
– Ensure frames complement surrounding decor.
By incorporating framed botanical art, you invite the serenity of nature into your home, enhancing its overall aesthetic.
5. Tips for Art Placement
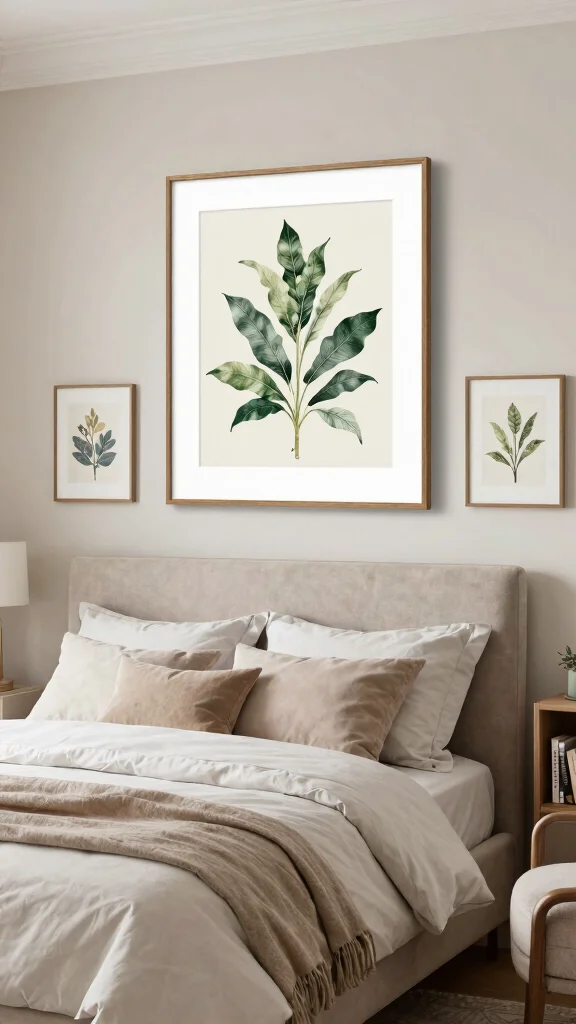
Properly placing your wall art is essential for achieving a curated and inviting atmosphere. A general rule is to hang art at eye level, around 57-60 inches from the floor. When positioning art above furniture, maintain a gap of about 6-12 inches between the top of the furniture and the bottom of the artwork.
Consider the function of the room as well; art in a dining area should encourage conversation, while pieces in a bedroom should promote relaxation. Avoid overcrowding your walls; allow each piece space to breathe and be appreciated.
Placement tips:
– Hang art at eye level for optimal viewing.
– Keep space between art and furniture.
– Avoid crowding; allow space around each piece.
Thoughtful art placement can significantly enhance the ambiance of your room, making it a more enjoyable space.
Dimensions & Size Guide
Understanding the right dimensions for your wall art is essential for creating a balanced and beautiful space. Choosing the perfect size can make a significant difference in how your room feels. Below is a detailed size guide to help you pick the ideal wall art for your home.
Standard Sizes & Measurements:
Wall art comes in various sizes, and knowing the common dimensions can guide your choices. Here are some typical wall art sizes you might encounter:
– 8″ x 10″ – Ideal for small spaces like entryways, or as part of a gallery wall.
– 12″ x 16″ – Great for accent spaces, such as above a bedside table or small shelves.
– 16″ x 20″ – Works well as a focal point above furniture, like a sofa or console table.
– 24″ x 36″ – This larger size is perfect for making a statement in living rooms or dining areas.
– 30″ x 40″ – Best for empty walls that need a bold piece to pull the room together.
It’s essential to consider the minimum requirements for proper fit. A piece should not overwhelm the space or appear too small. A general rule of thumb is to leave at least 6 to 12 inches of space around the art piece for a balanced look.
Quick Reference Table:
Here’s a simple comparison that shows different sizes along with their best uses:
Size/Dimension – Best for: [use case], Minimum space needed: [measurement]
– 8″ x 10″ – Best for: Small nooks, Minimum space needed: 12″ x 14″
– 12″ x 16″ – Best for: Accent walls, Minimum space needed: 16″ x 20″
– 16″ x 20″ – Best for: Above furniture, Minimum space needed: 20″ x 24″
– 24″ x 36″ – Best for: Statement walls, Minimum space needed: 36″ x 48″
– 30″ x 40″ – Best for: Large empty walls, Minimum space needed: 40″ x 50″
Space Planning Tips:
When planning the space for your wall art, consider these practical tips:
1. Measure your wall space: Before buying, measure the area where you want to hang the art. Ensure you allow enough room for the piece to breathe.
2. Eye Level Placement: Hang art at eye level, typically around 57 to 60 inches from the ground. This height allows viewers to appreciate the piece comfortably.
3. Consider the furniture: Take into account the height of your furniture. Wall art should ideally be about 6 to 12 inches above the back of the sofa or furniture piece.
4. Use painter’s tape: To visualize the size before hanging, use painter’s tape on the wall to outline the dimensions of the art piece. This helps prevent any surprises.
5. Avoid overcrowding: Do not overcrowd your walls with art. Leave adequate space between pieces, especially in a gallery wall setting, to let each art piece shine.
Common mistakes include buying art that is too small for the space or hanging it too high. Always aim for balance and proportion to enhance your home decor.
Pro Tip: The most important measurement to remember is the distance between the floor and the center of the artwork. Keeping it at eye level makes your art more inviting and visually appealing. So, take a moment, measure carefully, and enjoy the process of bringing your walls to life!
6. Considering Frame Styles
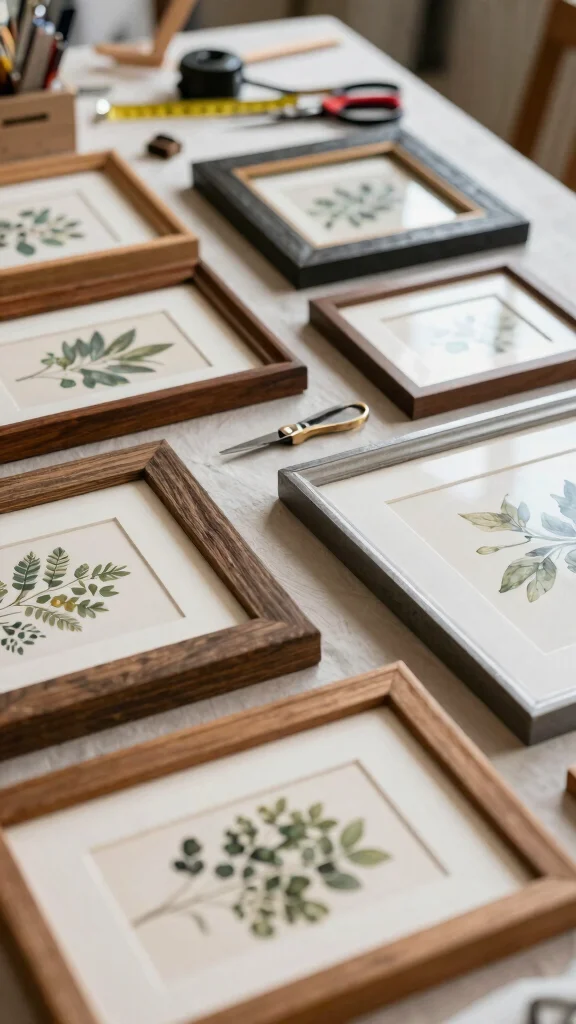
The style of the frame you choose can dramatically affect the overall presentation of your wall art. Wooden frames can add warmth and a natural touch, while sleek metal frames convey a modern aesthetic. For botanical art, consider frames that complement the organic theme—like reclaimed wood for a rustic feel or simple black frames for a contemporary look.
Matching frames to your room’s decor is important; rustic frames work beautifully in farmhouse settings, while sleek designs fit well in modern spaces. Don’t hesitate to mix frame styles on a gallery wall, as long as they harmonize with each other.
Frame style considerations:
– Match frames to your room’s overall aesthetic.
– Use matting to enhance art presentation.
– Mix styles thoughtfully for a cohesive look.
Selecting the right frame elevates your art pieces, making them stand out while enhancing your overall decor.
The right frame changes everything—wood adds warmth, black frames sharpen the botanical lines. For a rustic vibe, choose reclaimed wood; for a contemporary look, go sleek black, and use this wall art size guide to keep proportions in check.
7. Statement Pieces vs. Accents
Understanding the distinction between statement pieces and accent art is crucial for curating your collection. A statement piece is typically larger and serves as the focal point of a room, while accent pieces add interest and fill in gaps without stealing attention from the main artwork.
Choose a statement piece for expansive walls, such as a 60×48 framed botanical print, to create immediate impact. Surround it with smaller accent pieces, like 12×16 prints, to add depth and character while ensuring both share a common color palette.
When to use:
– Select a statement piece for larger walls.
– Surround with smaller accent pieces for balance.
– Maintain a cohesive color palette across all pieces.
By effectively combining statement and accent pieces, you can achieve a well-rounded display that feels curated and intentional.
8. Using Color Theory in Art Selection
Color theory is a vital aspect of home decor that can influence the mood and ambiance of your space. When selecting wall art, consider how the colors can either complement or contrast with your existing decor. Botanical art often features greens, whites, and earthy tones, making it a flexible choice for various styles.
Utilizing a color wheel can help you identify complementary colors for a cohesive look. For a serene atmosphere, opt for shades that blend harmoniously, such as pastel greens and soft browns. Conversely, bold contrasting colors can make your art pop against the backdrop.
Color selection tips:
– Use a color wheel for complementary selections.
– Choose calming shades for a serene vibe.
– Opt for bold contrasts for striking visuals.
By incorporating color theory into your art selection, you can enhance your space’s overall feel, creating a warm and inviting atmosphere.
9. Incorporating Texture with Art
Texture plays an essential role in design, and adding it to your wall art can create depth and intrigue in your decor. Consider mixed media pieces or artworks featuring layered materials, such as fabric or wood. Framed botanical art with textured backgrounds can enhance the visual experience, making it more engaging.
Look for artworks that incorporate three-dimensional elements or unique materials to add interest. Using shadow boxes for pieces with raised elements can create an inviting depth that captures attention. Pairing smooth-framed art with textured wall surfaces—like exposed brick or wood—can also enhance the overall aesthetic.
Ways to add texture:
– Seek out mixed media or three-dimensional artworks.
– Use shadow boxes for depth-enhancing frames.
– Combine smooth art with textured wall surfaces.
By integrating texture into your decor, you create an inviting atmosphere that captivates and engages the senses.
10. Measuring Spaces for Art
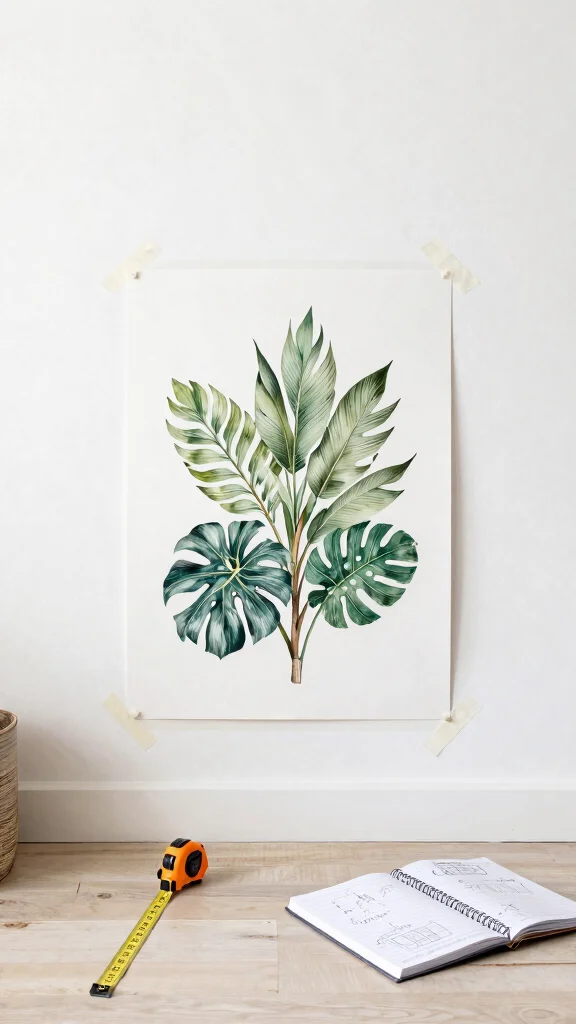
Before investing in artwork, it’s vital to measure the spaces where you plan to display it. Utilize a measuring tape to determine the height, width, and available space on the wall. This step ensures that your chosen art fits both physically and visually in your room, contributing to a balanced look.
Take note of your measurements and consider visualizing the layout using painter’s tape to outline potential placements. If hanging multiple pieces, ensure they collectively occupy no more than 50-75% of the wall space for a harmonious arrangement. Hanging larger pieces lower can also create an intimate feel in the room.
Measuring tips:
– Measure wall dimensions before purchasing art.
– Use painter’s tape to visualize layouts.
– Ensure multiple pieces stay within 50-75% of wall space.
Accurate measurements can save you the frustration of returning ill-fitting art, paving the way for a beautifully balanced design.
11. Layering Art for Depth
Layering art is an exciting technique to create a dynamic and engaging wall display. This involves arranging smaller pieces in front of larger ones or overlapping various artworks to enhance visual interest. Layering not only personalizes your space but also gives it a curated, gallery-like feel.
To achieve an effective layered look, consider the visibility of each piece to ensure they can all be appreciated. Use stands or easels to display smaller pieces in front of larger artworks for a three-dimensional effect. Selecting a cohesive color palette ties the layers together, making the display feel intentional.
Layering tips:
– Use stands for a 3D effect with smaller pieces.
– Choose a unified color palette for cohesion.
– Keep background pieces distinct to highlight foreground art.
Layering art invites creativity, transforming a standard wall into an inspiring visual experience.
12. Seasonal Art Swaps
Swapping your wall art seasonally is a delightful way to refresh your decor without a complete overhaul. In the spring and summer, embrace vibrant botanical prints featuring lively greens and floral patterns. As fall arrives, transition to deeper hues and textured pieces that evoke warmth and comfort. For winter, serene landscapes or minimalistic designs can create a cozy atmosphere.
Seasonal art swaps keep your decor feeling fresh and allow you to express your mood as the seasons change. This practice not only offers a chance to rotate and enjoy art that might otherwise be stored away, but it also brings new life to your space.
Benefits of seasonal art swapping:
– Keeps decor feeling fresh and engaging.
– Allows for personal expression as seasons shift.
– Rotating art makes previously stored pieces feel new.
Seasonal art swaps are an enjoyable way to enliven your environment, adding a touch of creativity to your home.
13. DIY Botanical Art Ideas
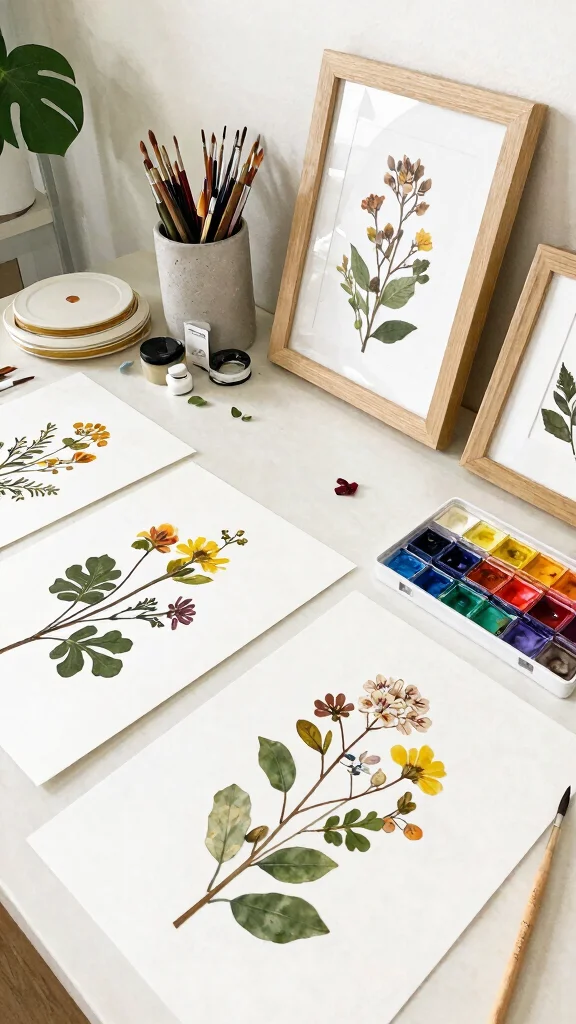
For those looking to add a personal touch to home decor, creating DIY botanical art is an enriching option. Gather pressed flowers, leaves, or even paint your own botanical-themed artworks. This approach not only saves money but also ensures your art is unique and meaningful.
Begin by collecting flowers and leaves, pressing them between the pages of a heavy book for a few weeks to dry. Once they’re ready, arrange them in a beautiful layout and frame them for a stunning display. Alternatively, you can create your own artwork using watercolors or ink to illustrate your favorite plants.
Steps to create DIY botanical art:
– Collect and press flowers or leaves for drying.
– Frame arranged dried botanical elements.
– Create original paintings of your favorite botanicals.
Crafting your own botanical art allows for creativity and a personal touch that store-bought pieces simply can’t replicate.
14. Art Sizing Recommendations
When unsure about sizing, referring to general art sizing recommendations can guide you in making the best choices for your space. Common sizes range from 8×10 inches for smaller prints to 24×36 inches for larger works. For gallery walls, incorporating an assortment of sizes can create a relaxed, curated feel while avoiding uniformity.
Understanding standard sizing helps ensure your wall art fits well in your designated space, contributing to a balanced and pleasing visual arrangement. Remember, the goal is to maintain proportion and harmony within your decor.
Standard sizing guide:
– Small: 8×10 to 12×16 inches; ideal for accenting.
– Medium: 16×20 to 24×30 inches; great over furniture.
– Large: 30×40 inches and up; perfect for spacious areas.
Always check that your wall art complements the dimensions of the space for an appealing aesthetic.
15. Final Thoughts on Wall Art Sizing
Selecting the right size for your wall art involves balancing aesthetics, space, and personal taste. Whether your preference leans toward vibrant botanical prints or serene landscapes, understanding dimensions, placement, and style mixing will help you curate a collection that reflects your unique style. Don’t hesitate to experiment and rearrange; your art should evolve alongside you and your home.
Ultimately, art is a personal expression, and what matters most is how it resonates with you. Embrace the journey of choosing pieces that speak to you, creating a space that tells your own story.
Conclusion
Finding the perfect wall art size is an exciting journey that allows for creativity and personal expression. Embrace the tips and recommendations shared in this guide to curate a beautiful and harmonious collection that reflects your style. Remember, the right pieces can transform your space, create a sense of belonging, and bring your home to life.
So go ahead, start measuring, and let your walls tell your story!
Note: We aim to provide accurate product links, but some may occasionally expire or become unavailable. If this happens, please search directly on Amazon for the product or a suitable alternative.
This post contains Amazon affiliate links, meaning we may earn a small commission if you purchase through our links, at no extra cost to you.
Frequently Asked Questions
What wall art sizes work best for framed botanical prints in a living room?
Choosing the right size for framed botanical wall art starts with knowing your wall space and ceiling height. Use practical steps to avoid guessing and ensure a balanced look.
Start with your primary rule: the wall art size guide helps you pick standard dimensions that fit—think 8×10, 11×14, 16×20, or a bold 24×30 statement piece. For a sofa, aim for art that is about 60–75% of the sofa width; on a tall wall, a single larger piece often works better than a crowded collage. Hang art at eye level (roughly 57–60 inches from the floor) and leave 2–4 inches of space around the frame to let it breathe. If you’re creating a botanical gallery, leave consistent spacing (2–4 inches) between frames and consider a cohesive mat color to tie the pieces together. A quick room-friendly home decor tip: use a template on the floor or painter’s tape on the wall to visualize the layout before nailing anything in place. This is a simple part of your wall art dimensions and art sizing recommendations to get the perfect fit.
How should I size and arrange a gallery wall of framed botanical prints for a dining room?
Gallery walls are a great way to showcase framed botanical art. Start by choosing a unifying frame style and color palette. Use a layout grid or salon-style arrangement; place a large anchor piece in the center and add smaller frames around it. Measure the wall and aim for the total width to be about 60–85% of the dining table width, so the art complements the space rather than overpowering it. Keep consistent spacing between frames, typically 2–4 inches. Use paper cutouts or painter’s tape to preview the layout before hanging. For a quick pro tip, hang in a single plane and keep the spacing uniform to maximize impact. This approach follows the wall art placement and interior design ideas from your wall art size guide.
What are common wall art dimensions for large walls vs small spaces?
Common wall art dimensions vary by space. For small spaces, start with 8×10, 9×12, or 11×14 pieces. For medium spaces, 16×20 or 18×24 works well. For large walls or tall ceilings, go bigger with 24×36, 30×40, or even larger if you want a dramatic focal point. If you’re combining pieces in a gallery, aim for a total width of 60–85% of the wall width and maintain consistent frame style and matting. For ceilings under 8 feet, smaller pieces work best; for 9 feet or more, you can go larger. When in doubt, consult the art sizing recommendations and use the wall art dimensions that fit your space.
What is the best height to hang framed botanical wall art?
Hang art so the center is around eye level, about 57–60 inches from the floor. If you’re placing above furniture, position the bottom edge 6–12 inches above the furniture to create a cohesive group. For multi‑piece displays, align the central reference line and keep even spacing (2–4 inches) between frames. In rooms with higher ceilings, you can raise the artwork a bit, but keep the center roughly at eye level for a comfortable view. This is a small but important aspect of wall art placement and interior design ideas.
How does wall art size influence interior design ideas and mood, and how can I adjust sizing as my room evolves?
Size sets the scale and mood. A single large botanical print can be a bold focal point on a blank wall, while a cohesive gallery of smaller pieces creates an intimate, curated feeling. When your room evolves, you can adjust sizing by swapping frames, expanding a gallery wall, or moving a focal piece to a different wall. Practical tips: start with a likely largest piece; build out with smaller frames using the wall art size guide to maintain balance. Always consider furniture scale and color palette to ensure the room stays cohesive. This is where interior design ideas and home decor tips converge.
Related Topics
wall art size guide
home decor
framed botanical art
art placement tips
interior design ideas
wall art dimensions
beginner friendly
space optimization
DIY wall decor
decor styles
art sizing recommendations
trending wall art